
Every drawing I do begins with a rough sketch. This helps me visualize the image I have rattling around in my head. One of the nice things about using Procreate on the iPad is that I can cut up the sketch and reposition elements until I’m satisfied with the overall composition of the figure—Note the ‘break’ in the sketch on the left arm just above the blaster. I enlarged and repositioned the blaster to move it away from the robot’s leg. I used this cut and paste process to get exactly the arm and leg position I wanted.
Once I’m satisfied with the scribbles, I’ll adjust the opacity of the sketch to about 40% and begin drawing the final line on a new layer. Depending on how polished you want the line to look, you can choose a pencil, pen, or brush to draw the line. For these robot drawings, I’m using a technical pen setting with customized stroke properties to draw the final line.

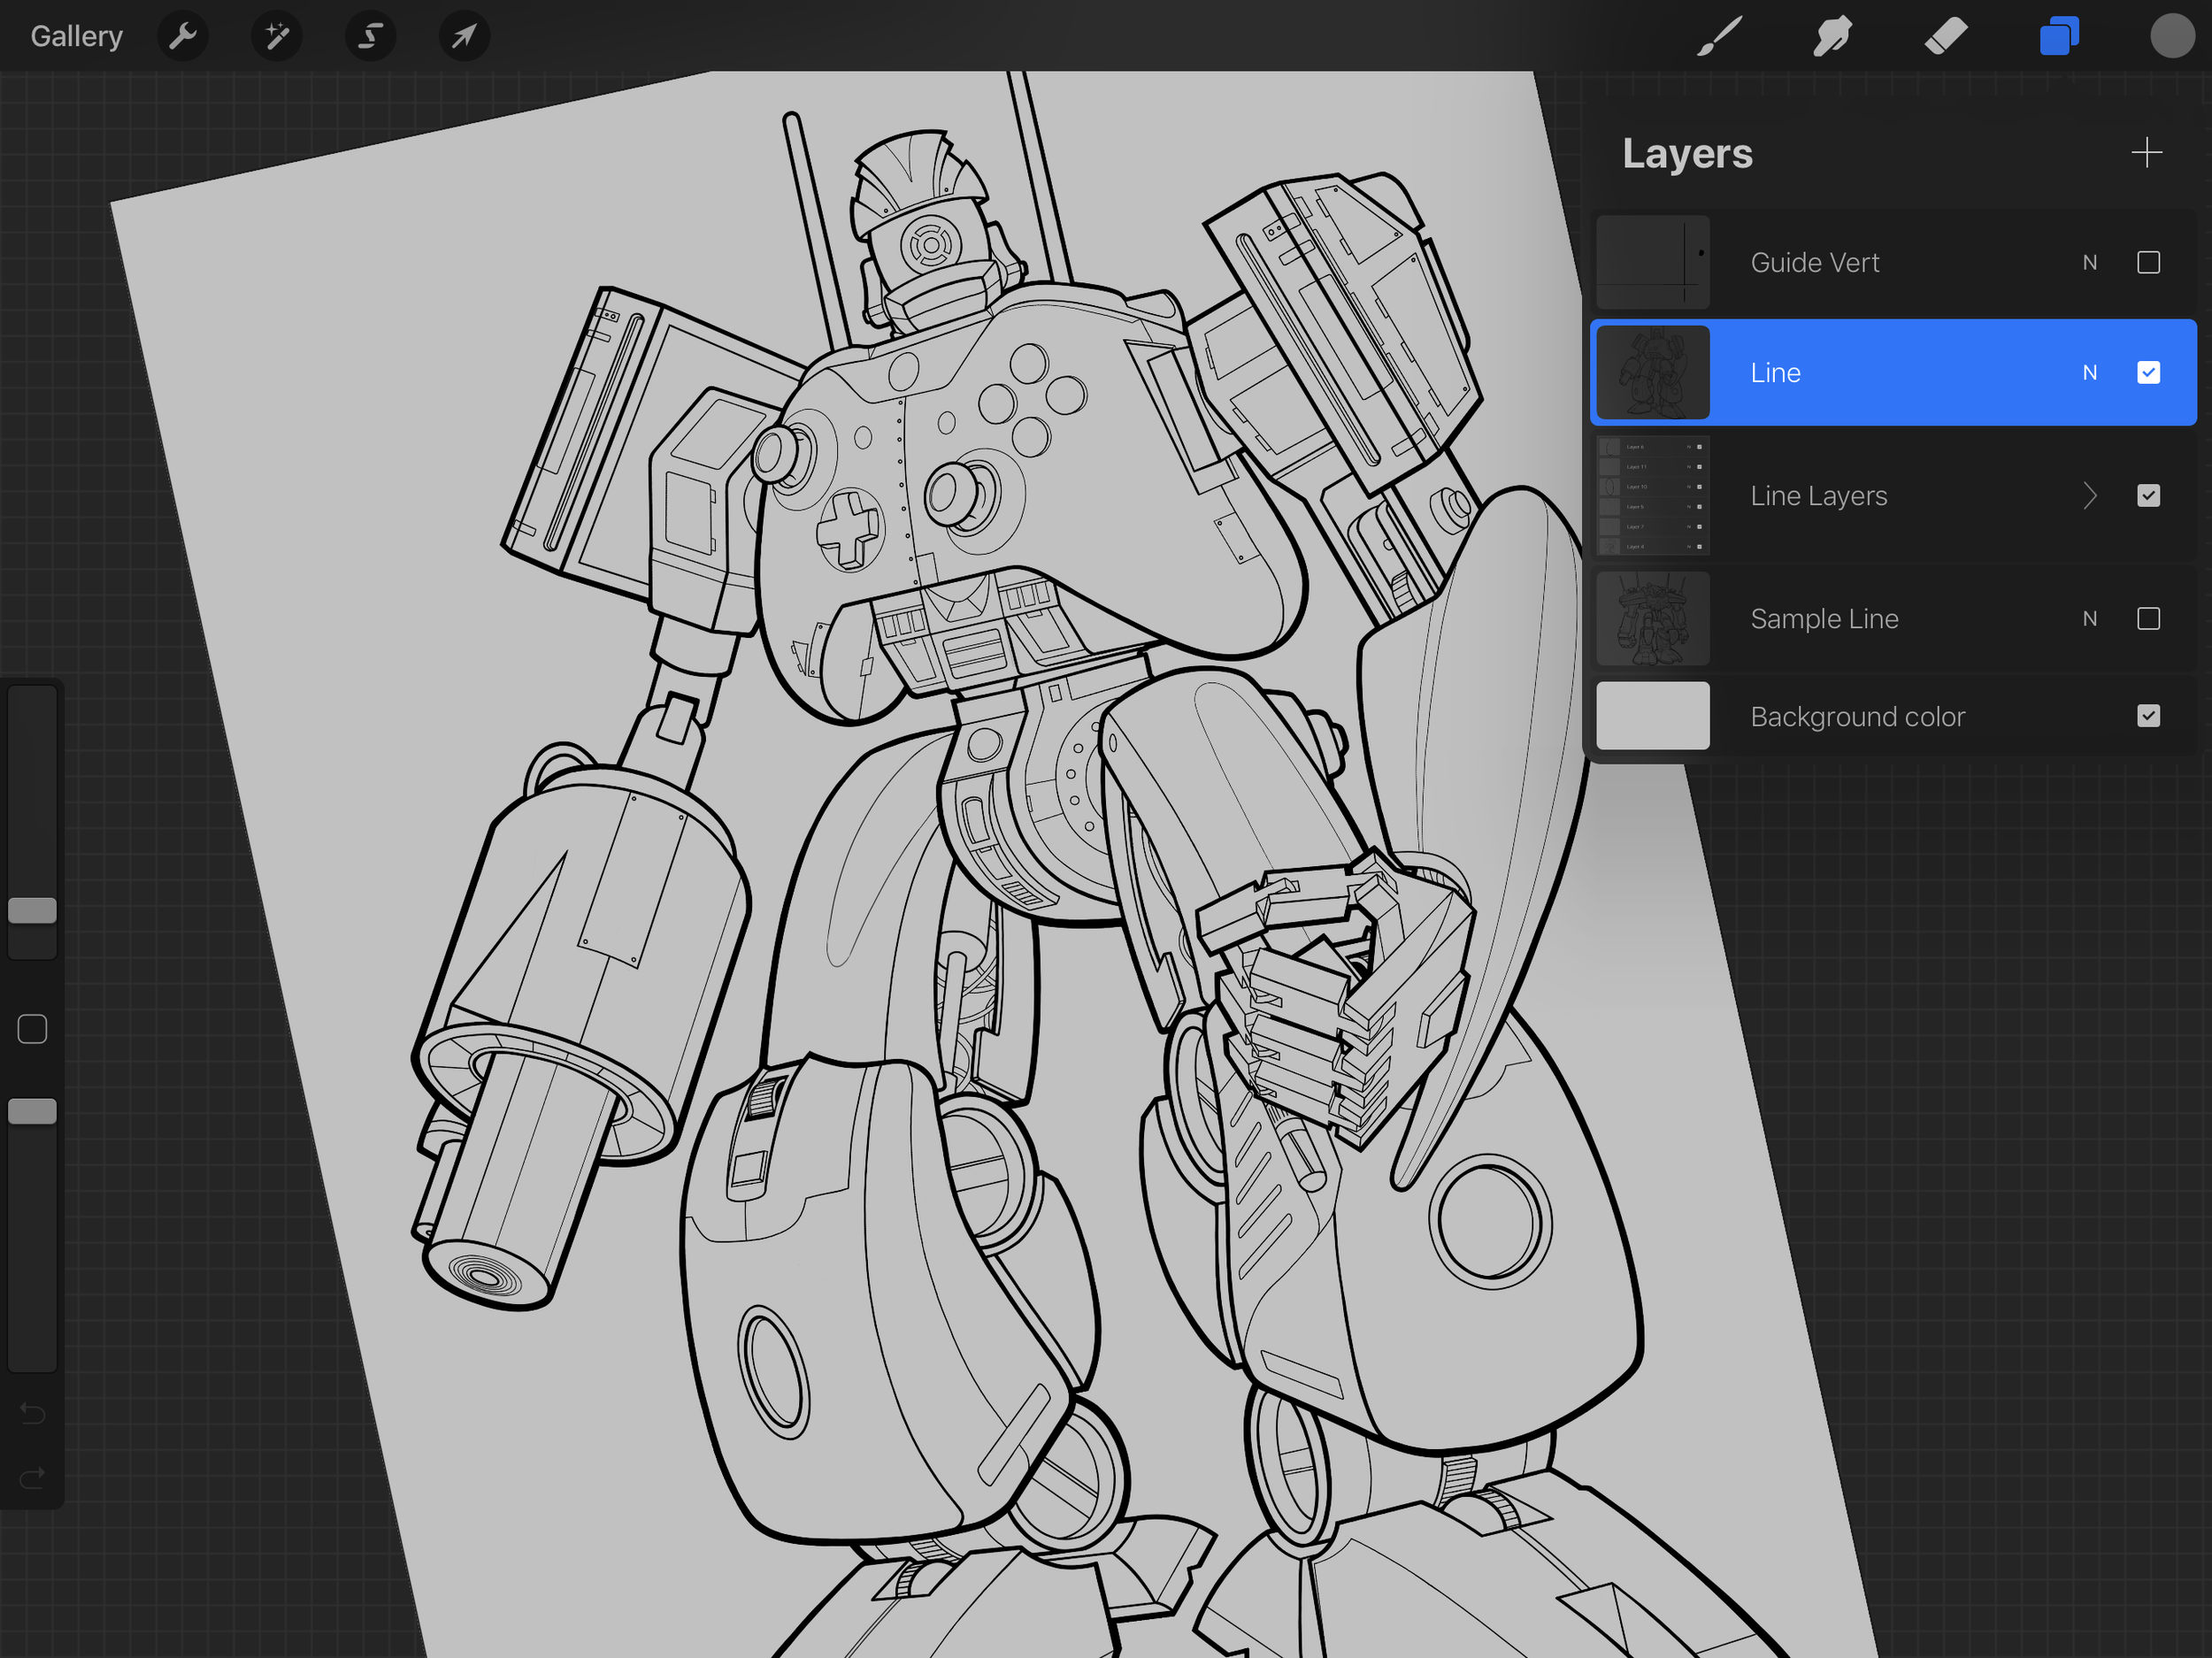
Beginning the final line art
I’ll redraw the entire figure with a thin black line, then go back over the line drawing with a thicker technical pen setting to give the line a little more depth and character, as shown below on the left. Note that I take full advantage of the layers in Procreate to draw parts of the robot—arms, legs, torso, and head are drawn on different layers just in case I want to make additional positioning adjustments. The closer you get to the finished piece, the harder it becomes to make changes.
Tip: The more organized you are with your process (layering, file management, etc) the more likely you will be able to avoid headaches when your client comes back to you with changes.
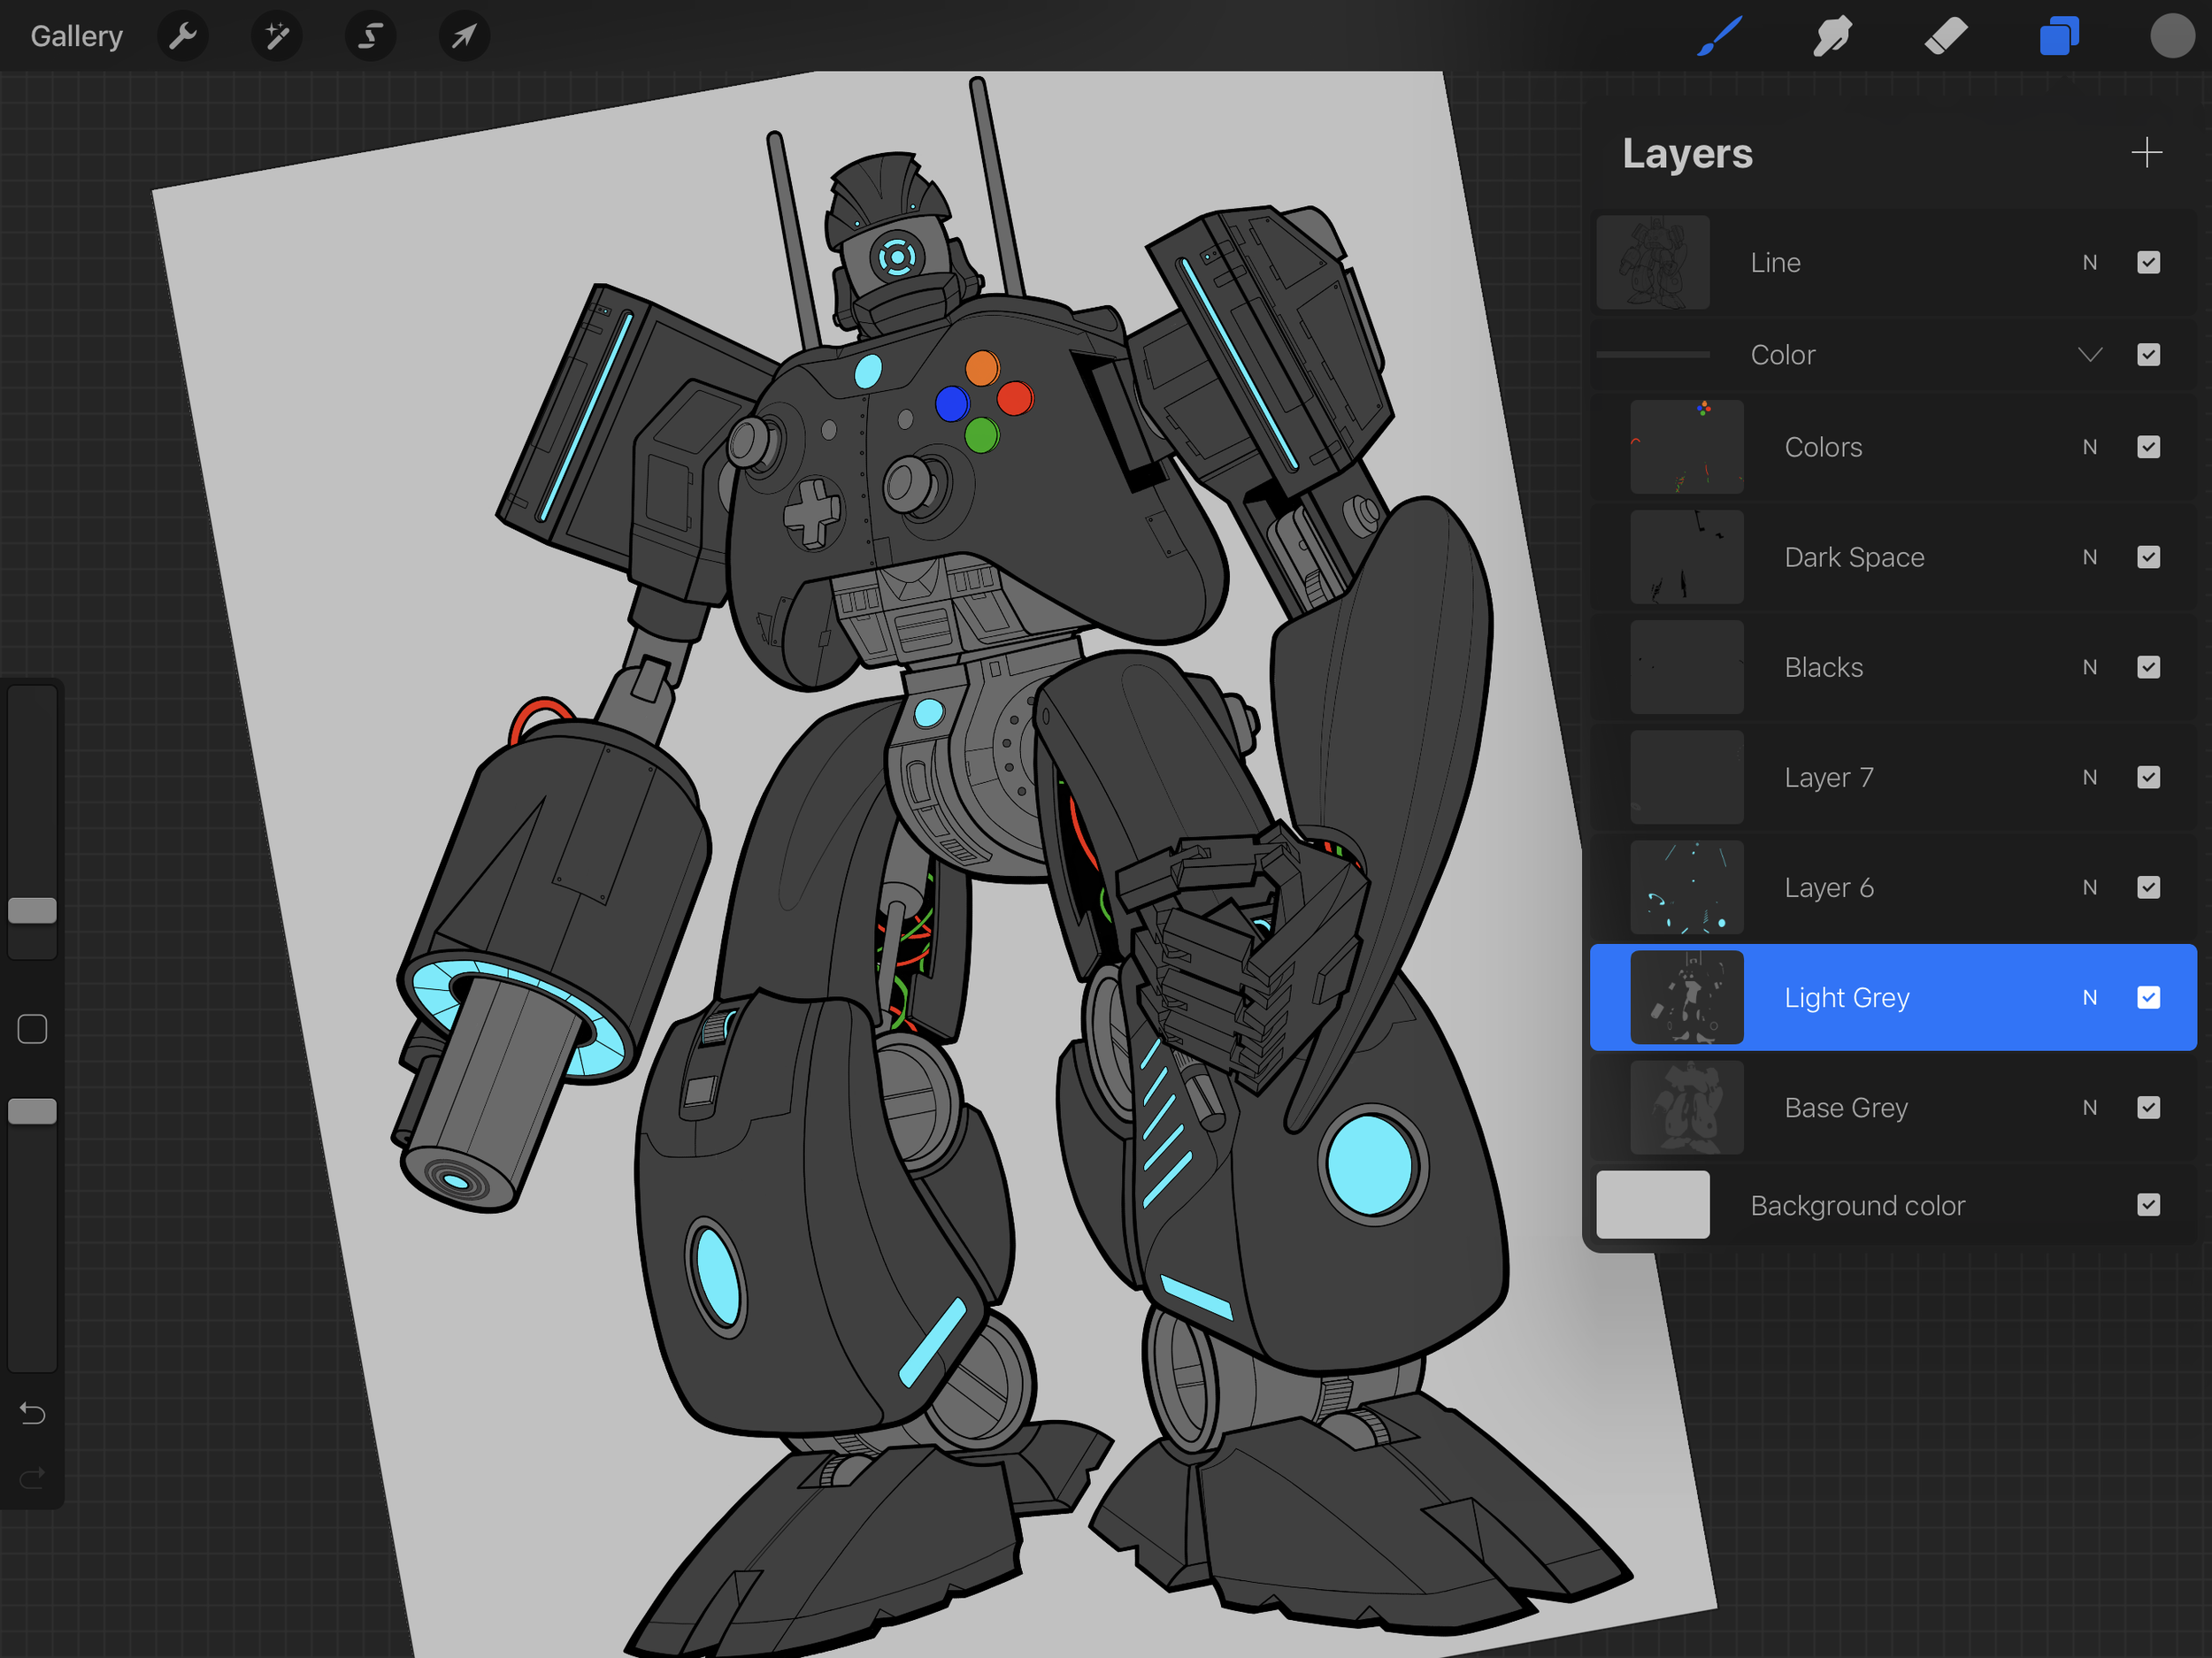
The next step is to colorize the robot. I’ll collapse the line art, move it to the top of the layer palette, then start coloring, again taking full advantage of layers to add color below the line art.
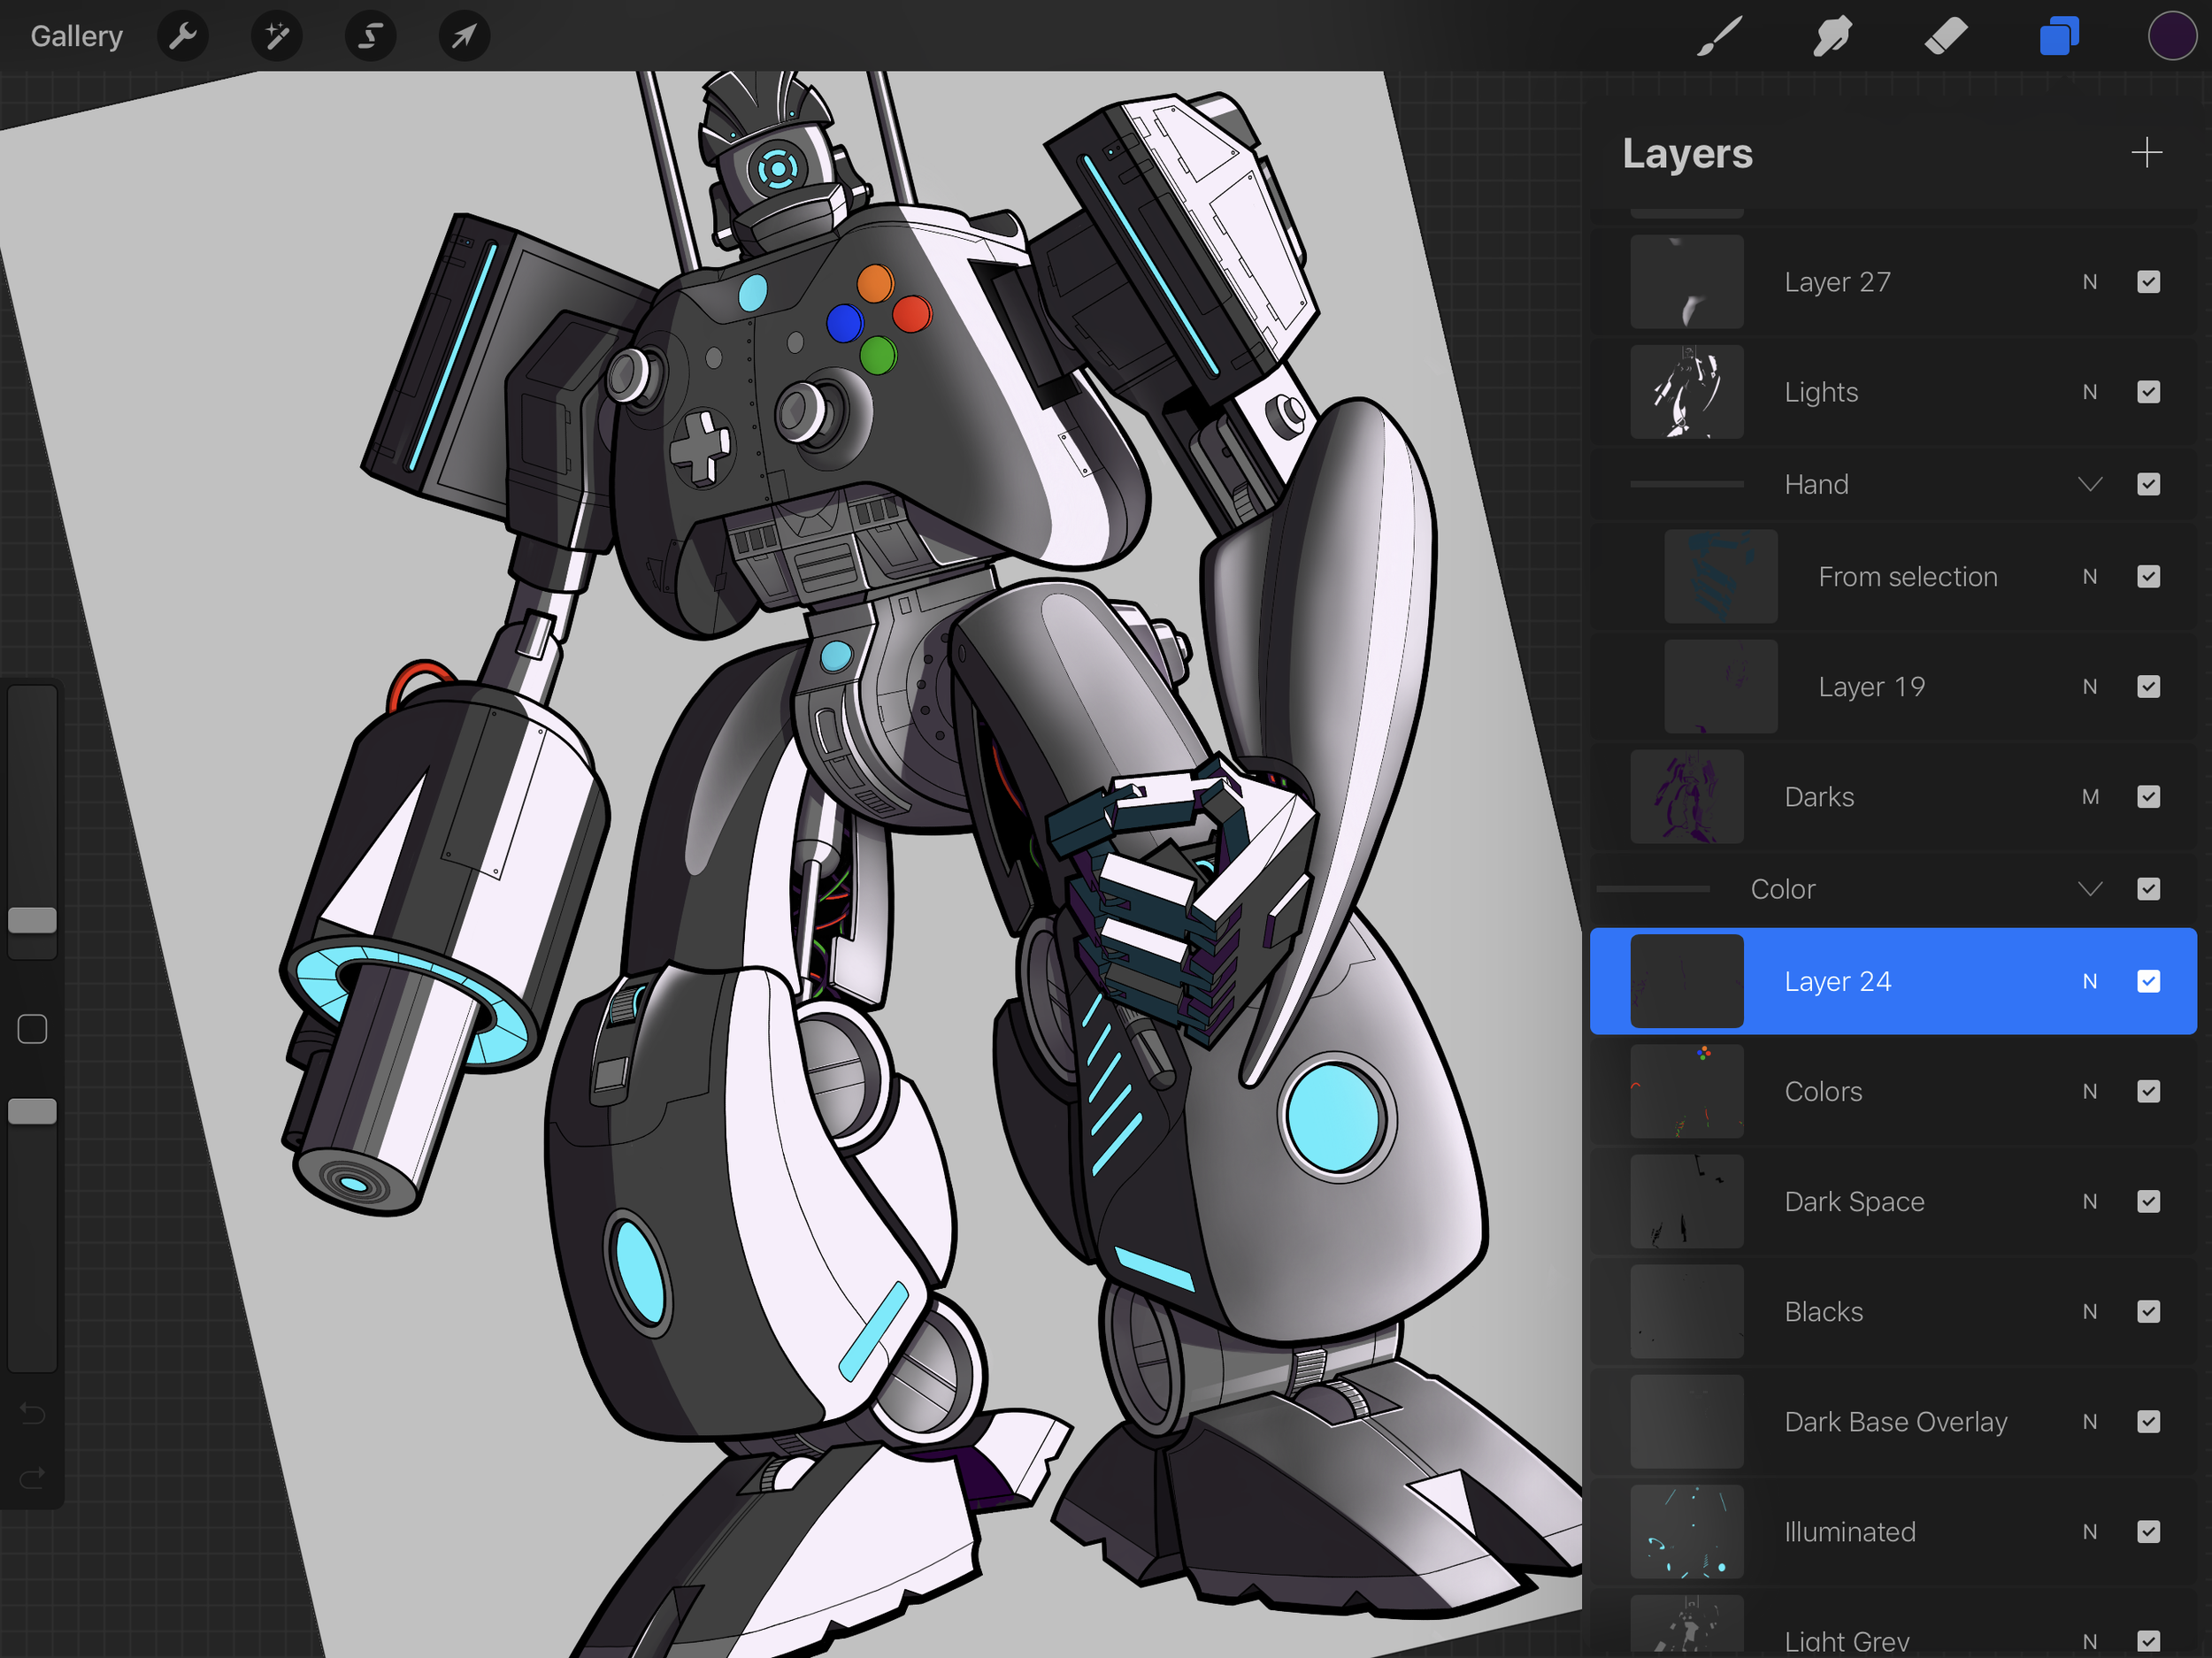
My final step in Procreate is to model the lights and darks as shown in the third image below.
Depending on the size of your files in Procreate, you may need to export staged PSDs to your desktop or laptop and composite them in Photoshop. I do this with nearly all of my illustrations. Once I have all the pieces in Photoshop, I’ll apply the modeling layers and adjust the layer settings to blend the darks and lights and apply filters where needed.
It’s worth noting that I don’t spend too much time worrying about how perfectly the lights and darks fall on the figure. I choose an angle, then estimate where I want them to fall and adjust based on how I want the overall feel of the character to be represented. As long as you have a basic understanding of how light and shadow fall on simple objects like spheres, squares, and triangles, you can have a little fun with your own creations without worrying about perfection.
Final Gamerbot
Finally, I’ll add visual character like scuffs and scratches to the metal and special effects such as lightning using Photoshop.

